

How to Share Files Between Windows 11 PCs Using Nearby Sharing
 Bijay Pokharel,
November 19, 2026
6 min read
Moving a document or photo from one Windows laptop to another does not always require a USB drive, email attachment or cloud upload. Windows 11 includes Nearby sharing, a built-in feature that sends files and links to nearby Windows PCs using Bluetooth or Wi-Fi.
The feature works between supported Windows computers. It is different from Google’s Quick Share app, which is used for Android-to-Windows transfers. This guide covers the Windows feature and explains how to make both PCs discoverable, choose where received files go and fix common transfer problems.
What you need before using Nearby sharing
Check these points on both computers before trying to send anything:
- Both PCs should run Windows 11. A Windows 10 computer can also participate if it has version 1803 or later, although Microsoft ended Windows 10 support on October 14, 2025.
- Both computers need Bluetooth 4.0 or later with Bluetooth Low Energy support, and Bluetooth must be switched on.
- Turn on Wi-Fi on both PCs. For Wi-Fi transfers, the computers must be connected to the same private Wi-Fi network and the sending PC must be running the latest version of Windows 11. Otherwise, Nearby sharing can use Bluetooth.
- Keep the computers close enough to detect each other. Make sure neither one is asleep during a transfer.
Step 1: Turn on Nearby sharing on both PCs
You must enable the feature on the computer sending the file and the one receiving it. The setting is not automatically enabled just because Bluetooth is on.
- Open Settings on the first PC.
- Select System, then open Nearby sharing.
- Under the Nearby sharing setting, choose who can share with the computer. Select My devices only if you are transferring between your own PCs signed in with the same Microsoft account. Choose Everyone nearby when you need to receive from another trusted Windows user.
- Repeat the same steps on the second PC.
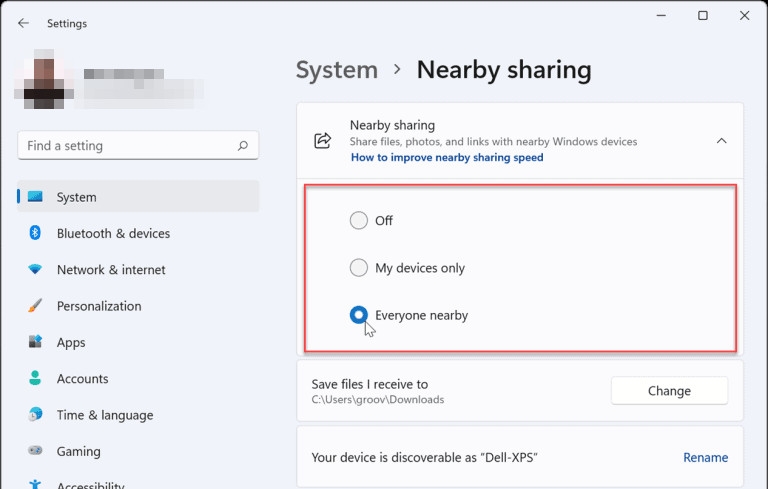
There is an important privacy difference between these choices. When you select Everyone nearby, Windows makes your PC name and Bluetooth MAC address available to nearby devices so they can discover it. That does not mean strangers can automatically take files from your computer, but it does make the device easier to identify. Switch back to My devices only or Off when you finish sharing.
Step 2: Choose where received files are saved
Windows uses a default folder for files received through Nearby sharing, but you can change it before transferring anything.
- On the receiving PC, open Settings > System > Nearby sharing.
- Find Save files I receive to.
- Select Change, choose the folder you want to use and confirm with Select folder.
Choose a location that has enough free space, especially if you expect to receive large videos or several files. You can return to this setting later without changing how the other computer sends files.
Step 3: Send a file to the other Windows computer
Once Nearby sharing is enabled on both devices, you can send a file directly from File Explorer.
- On the sending PC, open File Explorer and find the document, photo, video or other file you want to transfer.
- Select the file and choose Share from the toolbar. You can also right-click the file and select Share from the context menu.
- Wait for the sharing window to find nearby devices.
- Select the name of the receiving PC.
- Look at the second computer. When the sharing notification appears, choose Save or Save & open.
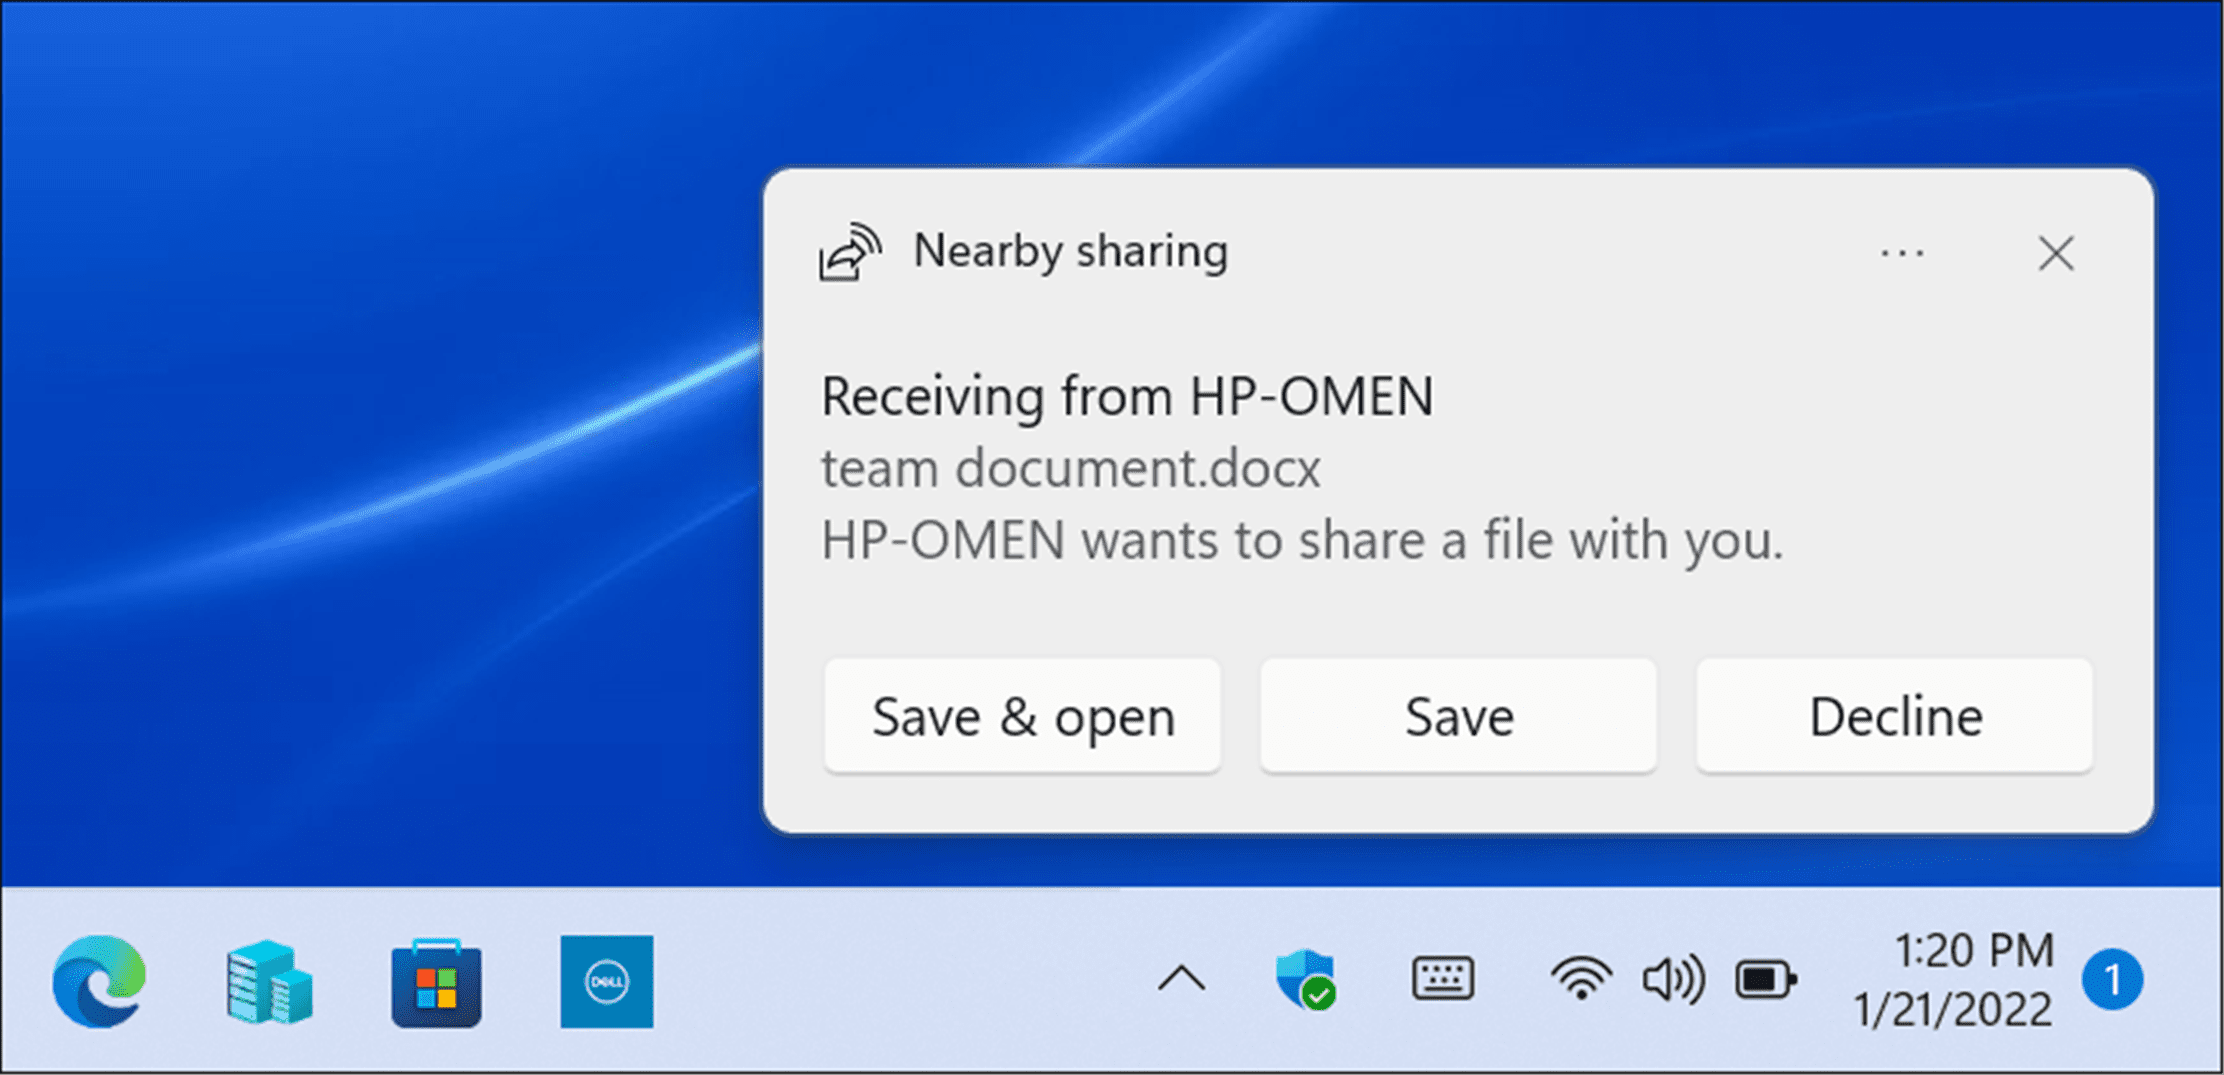
The file is saved to the receiving computer’s selected destination folder. If you choose Save & open, Windows also opens the received file with its associated application. Only accept transfers you were expecting from someone you trust.
Step 4: Share a webpage from Microsoft Edge
Nearby sharing can also send a website link, so you do not need to copy a long address into a message.
- Open the webpage in Microsoft Edge on the sending PC.
- Select Settings and more (the three-dot menu).
- Open More tools, then select Share.
- Choose the nearby Windows PC from the list.
- On the receiving computer, select Open when the notification appears.
Nearby sharing is not finding the other PC
If the receiving computer does not appear, check the basics first. Nearby sharing must be enabled on both PCs, and both Bluetooth and Wi-Fi should be on. If you selected My devices only, make sure both computers are signed in to the same Microsoft account.
For Wi-Fi sharing, check that both computers are connected to the same trusted network and that Windows identifies it as a Private network. Open Settings > Network & internet, select the connected Wi-Fi network (or Ethernet connection), and check Network profile type. Only use the Private profile on a network you trust; do not change a public café or airport hotspot to Private just to make sharing work. If you need to review your home network first, follow this guide to secure your home Wi-Fi router.
Microsoft also recommends checking whether the Bluetooth adapter supports Low Energy Central Role. To do this, open Device Manager, expand Bluetooth, right-click the Bluetooth radio and select Properties. Open the Details tab, choose Bluetooth radio supports Low Energy Central Role from the Property list and check whether its value is True. If the property is missing or reports False, that computer may not meet the requirement.
Why is the transfer slow or the notification missing?
Bluetooth is slower than Wi-Fi for large files. If both computers are on the same private Wi-Fi network and the sending PC has the latest Windows 11 version, try the transfer again over Wi-Fi. Keep both devices awake and close to each other, and avoid closing the lid or letting either PC enter sleep mode while the file is moving.
If the transfer seems to arrive but no pop-up appears, open the notification area on the receiving PC and look for the Nearby sharing request there. Focus or Do Not Disturb settings can prevent a notification from appearing on screen even when it is available in the notification center.
If the transfer repeatedly stops, restart Bluetooth and Wi-Fi on both computers, restart the PCs and check for updates to the Bluetooth and Wi-Fi drivers in Device Manager. On a work-managed computer, network or security policies may also restrict sharing, so check with the administrator rather than turning off the firewall.
If this article helped you, please consider supporting our work. Every small contribution keeps Abijita.com independent and running.

For Microsoft’s full compatibility notes and additional fixes, see its official guides to sharing with nearby devices in Windows and fixing Nearby sharing problems.
Turn Nearby sharing off when you are finished
When you have sent the files you need, return to Settings > System > Nearby sharing and select Off, or switch to My devices only if you regularly transfer files between your own computers. This keeps the feature from remaining discoverable to everyone nearby when you are not using it.







SIGN UP FOR NEWSLETTERS
Please confirm your email address.
Sign up for cybersecurity newsletter and get latest news updates delivered straight to your inbox. You are also consenting to our Privacy Policy and Terms of Use.