

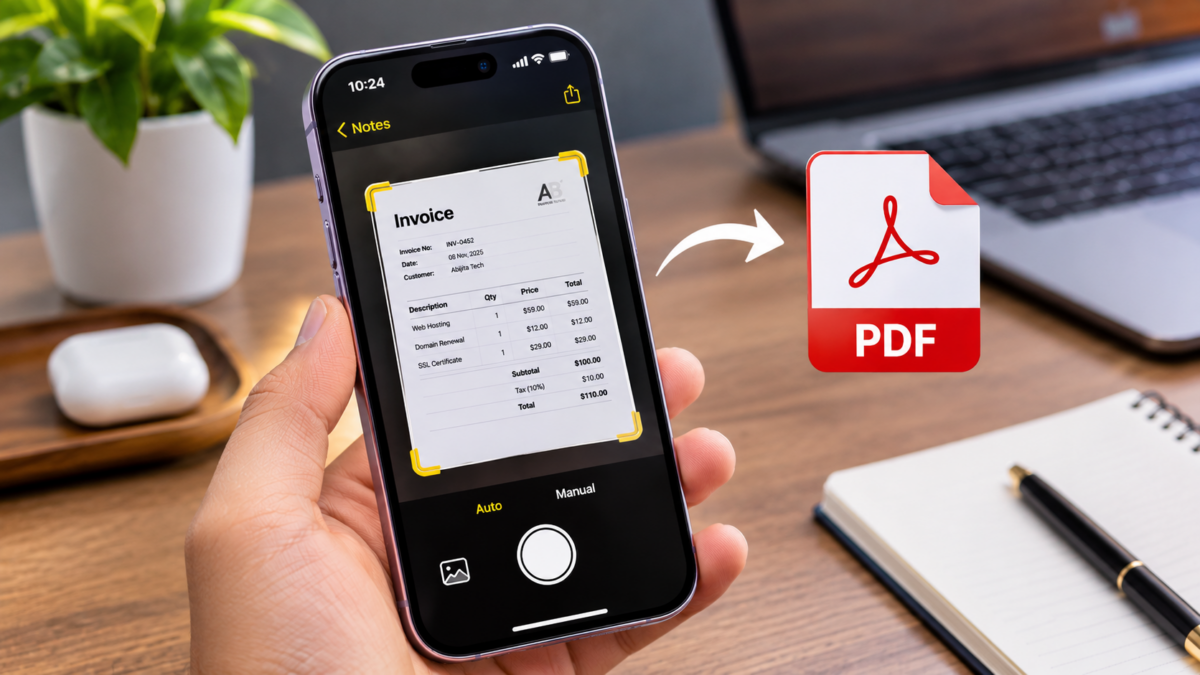

You do not need to install a separate scanner app to turn paper documents into PDFs on an iPhone. The built-in Notes and Files apps can scan pages with the camera, while the Preview app on iOS 27 can create a PDF directly on iPhones that include it. The main difference is where the finished file is saved.
Quick answer: Use Files if you want the PDF saved directly in a folder, Notes if you want to keep the scan with written notes, or Preview if you want to create and manage a PDF in one place.
Which iPhone app should you use?
| App | Best for | Where the scan goes |
|---|---|---|
| Preview | Creating and managing a PDF directly | Preview’s document library |
| Files | Saving a PDF into a chosen folder | The folder you select in Files |
| Notes | Keeping a scan with written notes or other information | Inside the selected note as a PDF |
Method 1: Scan documents to PDF with Preview
If your iPhone includes Apple’s Preview app, this is a straightforward way to create a PDF without first making a note or choosing a folder. Apple’s iPhone guide to scanning documents in Preview covers this workflow in iOS 27.
- Open the Preview app on your iPhone.
- Tap Scan Documents on the start screen.
- Place the paper on a flat surface and position the iPhone so the full page appears inside the camera frame. Keep the phone steady while it captures the page automatically.
- To capture a page yourself, tap Auto. The control changes to Manual. Then tap the Shutter button when the page is framed correctly.
- Repeat the scan for every page you want in the same PDF.
- Tap the page thumbnails to crop, rotate, or adjust the scan’s colour if needed.
- Tap Done. Preview combines the captured pages into one PDF.
When you finish, use the Back button to save the file and return to Preview’s main screen. To give it a clearer name, open the file, tap the actions menu beside its filename, and choose Rename. The same menu includes a Move option if you want to put the PDF in another location. Apple’s guide to saving, renaming, and moving PDFs in Preview explains these file-management options.
Method 2: Scan a document directly into Files
Choose Files when you want the finished PDF in a specific folder, such as Downloads, On My iPhone, or iCloud Drive. This avoids having to export a scan from a note later.
- Open the Files app.
- Browse to the folder where you want to keep the PDF. You can create or open a folder before scanning.
- Tap the More button (the three-dot menu), then choose Scan Documents.
- Hold the iPhone over the page. In Auto mode, the scanner captures it when it detects the document edges.
- If automatic capture does not work, switch to manual capture, tap the Shutter button, and adjust the corner handles so the scan follows the page.
- Tap Keep Scan and repeat the process for the remaining pages. Do not finish the scan until you have added every page you need.
- Tap Done, choose the save location if prompted, and tap Save.
The PDF is saved in the Files location you selected. Open it to check that every page is included. You can then use the Share button to attach it to an email or send it through a messaging app. Apple’s document-scanning guide for iPhone and iPad also covers the Notes and Files workflows.
Method 3: Scan a document inside Notes
Notes is useful when the scan belongs with other information. For example, you can keep a scanned receipt with a note about a purchase or attach meeting paperwork to the notes you wrote during the meeting.
- Open Notes and select an existing note or create a new one.
- Tap the Attachment button, usually shown as a paperclip, then tap Scan Documents.
- Position the document inside the camera frame. Let Auto mode capture it, or switch to manual mode and use the Shutter button or a Volume button.
- Check the page edges. Drag the corners if the scan includes too much of the table or cuts off part of the paper, then tap Keep Scan.
- Scan additional pages if the document has more than one page.
- Tap Done when all pages have been captured.
The scan appears inside the note as a PDF document. Tap it to open the scan, then use its menu or Share button to copy, rename, or send it. If you need a separate file in Files, use the sharing options and choose a destination available on your iPhone.
How to get a clear scan
- Use a plain, contrasting surface. A dark desk under a white page, for example, can make the page edges easier for the scanner to detect.
- Keep the paper flat. Smooth out folded corners and remove clips that cover text.
- Avoid shadows and glare. Move your hand and phone so they do not cover the page with a shadow. Glossy paper may need a different angle or less direct light.
- Check every page before saving. Zoom in on small print, dates, account numbers, and signatures to make sure they are readable.
- Use manual capture when needed. If the scanner keeps choosing the wrong edges, switch from Auto to Manual and adjust the corners yourself.
Common scanning problems and fixes
The iPhone does not detect the page
Move the document to a brighter area, place it on a flat surface, and hold the phone steady. If the automatic shutter still does not trigger, change to Manual and capture the page yourself.
The scan cuts off a corner or includes the desk
Open the page preview before keeping it and drag each corner handle to match the paper. If the page is badly framed, retake it rather than keeping an unreadable scan.
Only the first page appears in the PDF
Return to the scanning screen and add the remaining pages before tapping Done. In Notes and Files, choose the option to keep or add each scan, then finish the whole document in one session. Preview also lets you repeat the capture step for additional pages before completing the PDF.
I cannot find the PDF after scanning
Check where you created it. A Notes scan stays inside its note, a Files scan is saved in the folder you selected, and a Preview scan is managed from the Preview app. If you need to send the document as an attachment, use the Share option or save a copy to a folder you can find easily.
Sharing or editing the finished PDF
For a quick hand-off, open the PDF in Files or Preview and use the Share button to send it by email, AirDrop, or another supported app. Notes can also share the scanned PDF from inside the note. If you need changes beyond cropping, rotating, or adding a signature, Abijita’s guide to online PDF editors compares tools that can edit documents in a browser. Avoid uploading passports, bank statements, or other sensitive paperwork to an unfamiliar service; use a trusted local app when the document contains private information. If a multi-page scan is too large to email, see our guide to sharing large files online without losing quality.
Frequently asked questions
Can I scan multiple pages into one PDF on an iPhone?
Yes. Notes, Files, and Preview let you capture more than one page before you finish. Complete the scan session only after all pages have been added.
Do I need to download a scanner app?
No. The built-in Notes and Files apps can scan documents. Preview also supports scanning to PDF on iPhones that include the app.
Where are scanned documents saved on an iPhone?
It depends on the app. Notes keeps the scan inside a note, Files saves it in the folder you choose, and Preview manages the PDF in its document library.
If this article helped you, please consider supporting our work. Every small contribution keeps Abijita.com independent and running.

Can I sign a scanned PDF on my iPhone?
Yes. Notes includes Markup tools for adding a saved or new signature to a scanned document. Preview can also fill out and sign supported PDF forms.
For a PDF you plan to upload or email, Files is usually the simplest choice because you select its destination before scanning. Use Notes when the document belongs with written information, or Preview when you want to scan and manage the PDF directly.







SIGN UP FOR NEWSLETTERS
Please confirm your email address.
Sign up for cybersecurity newsletter and get latest news updates delivered straight to your inbox. You are also consenting to our Privacy Policy and Terms of Use.